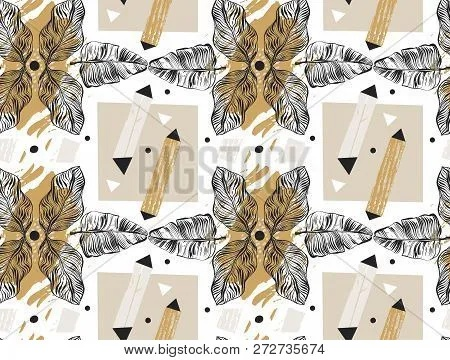
Creating a Canvas of Summer with Textile-Printed Watercolors
Introduction: Summer is synonymous with refreshing drinks, warm breezes, and the tantalizing aroma of freshly cut fruits. For many, this season brings an opportunity to express their creativity through art, be it painting, drawing, or crafting. Among these artistic endeavors, textile-printed watercolor paintings have become increasingly popular due to their unique aesthetic appeal and ease of use. In this guide, we'll explore how to transform ordinary textiles into canvases for creating your very own summertime masterpieces using watercolors.
Materials Needed:
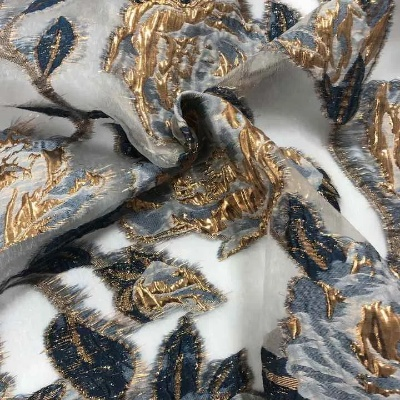
- Textile-printed fabric (e.g., cotton, linen, silk)
- Watercolor paints (preferably watercolors that are safe for use on fabric)
- Watercolor paper or canvas
- Stamps or transfer papers
- Ruler or measuring tape
- Scissors
- Paintbrushes (for both watercolors and fabric)
- Optional: A spray bottle filled with water and acrylic sealer for final application
Step 1: Choose Your Fabric Select a textile-printed fabric that you find visually appealing and suits the color palette you want to use. The texture and pattern of the fabric will play a crucial role in the final outcome of your artwork.
Step 2: Prepare Your Canvas Lay out your watercolor paper or canvas on a flat surface. If using a canvas, consider its size and weight; it should be sturdy enough to support the weight of the paints without tearing or warping.

Step 3: Transfer the Design Using stamps or transfer papers, carefully apply the design onto the fabric. Make sure to follow the manufacturer's instructions for best results. Once the design is transferred, trim any excess fabric from around the edges.
Step 4: Apply Watercolor Painting Using watercolor paints, begin by applying a thin layer of paint to the fabric. This will act as a base layer for the subsequent layers. Use a blending tool or sponge to blend colors together until you achieve the desired effect. Be mindful not to overapply paint to avoid smudging or blotches.
Step 5: Add Color and Details Once the initial layers are dry, start adding more vibrant colors and detailed elements. You can either go back to the same spot and build up the colors or start new areas with different colors for a more dynamic effect.
Step 6: Final Touches Take your time to refine your work. Add highlights, shadows, and shading where necessary to create depth and dimensionality. Consider using acrylic sealer to protect your artwork from moisture and fading after it's complete.
Case Study: "A Summer Garden" Let's take a closer look at "A Summer Garden," an example of a textile-printed watercolor painting. The artist used a light blue cotton fabric with a floral pattern to create a whimsical scene of a summer garden. They started by transferring the design onto the fabric and then applied several layers of watercolor paint, starting with a light wash of greens and browns to establish the background. As they worked their way towards the center of the painting, they added vibrant shades of pink, yellow, and orange to depict blooming flowers and vibrant greenery. Finally, they added details such as butterflies fluttering among the petals and a few leaves rustling in the breeze. After completing the painting, they sealed it with acrylic sealer to protect it from future wear and tear.
Conclusion: Creating textile-printed watercolor paintings is a wonderful way to bring the beauty of summer into your home or studio. With careful planning and execution, even the most unconventional materials can be transformed into works of art that capture the essence of the season. So why not give it a try? Get creative and make your own colorful masterpiece today!
Hi, I'm here to help you with a creative project that involves painting textiles with a specific ingredient - let's call it "纺织品颜料画西瓜". We'll break down the process step by step and provide an English case study to illustrate the technique.
准备工作
我们需要准备一些必要的工具和材料,纺织品颜料是绘制西瓜的关键,它们可以是各种鲜艳的颜色,可以根据西瓜的色彩和纹理进行选择,我们还需要一些绘画纸、铅笔、水彩笔或油画棒等工具。
绘制步骤
- 选择颜色:选择适合画西瓜的纺织品颜料,可以是鲜艳的红色、黄色或绿色等,根据西瓜的色彩和纹理,选择合适的颜色。
- 构思设计:根据西瓜的形状和特点,构思一个有趣的图案或设计,可以想象西瓜的外形、纹理、纹理之间的对比等。
- 绘制西瓜轮廓:使用铅笔或水彩笔在绘画纸上绘制西瓜的基本轮廓,注意画出西瓜的形状和纹理,使其看起来更加生动。
- 着色:使用水彩笔或油画棒,根据设计在纺织品上进行着色,注意颜色的搭配和过渡,使整个画面看起来更加协调。
- 完善细节:在西瓜的表面添加一些细节,如纹理、纹理之间的对比等,可以使用铅笔或细刷子进行精细的描绘。
案例说明
让我们通过一个具体的英文案例来说明如何使用纺织品颜料画西瓜,假设我们有一件纺织品围裙,上面绘制了一片鲜艳的西瓜图案。
选择颜色和设计图案 我们选择了鲜艳的红色作为主要颜色,结合西瓜的绿色和黄色纹理,设计了一个有趣的西瓜图案。
绘制西瓜轮廓 使用铅笔在围裙上勾勒出西瓜的基本轮廓,注意画出西瓜的形状和纹理,使其看起来更加生动。
着色 使用水彩笔或油画棒,根据设计在围裙上进行着色,注意颜色的搭配和过渡,使整个画面看起来更加协调,我们还可以添加一些细节,如西瓜表面的纹理和颜色对比等。
总结与拓展
通过这个项目,我们不仅学会了如何使用纺织品颜料画西瓜,还了解了如何在绘画中运用色彩和纹理的表现手法,我们还可以通过更多的案例学习和实践,提高自己的绘画技巧和创造力。
纺织品颜料画西瓜是一项有趣且富有创造性的艺术创作活动,通过选择合适的颜色和设计图案,使用绘画工具进行着色和细节描绘,我们可以创造出令人惊叹的作品,希望这个项目能够帮助你更好地掌握纺织品颜料画画的技巧和方法,提高自己的绘画水平。
Articles related to the knowledge points of this article:
The Environmental Impact of Textile Manufacturing
The Ins and Outs of Textile Packaging Standards
Recycling Textiles:A Sustainable Approach to Material Renewal