The Ultimate Guide to Threading a Textile Machine
Introduction: In the world of textile production, threading machines is an essential skill that every textile worker should have. It's a process that involves inserting and winding threads through the machine's bobbin system. In this guide, we will walk you through the step-by-step process of threading a textile machine, including tips and tricks for ensuring accuracy and efficiency. Let's dive in!
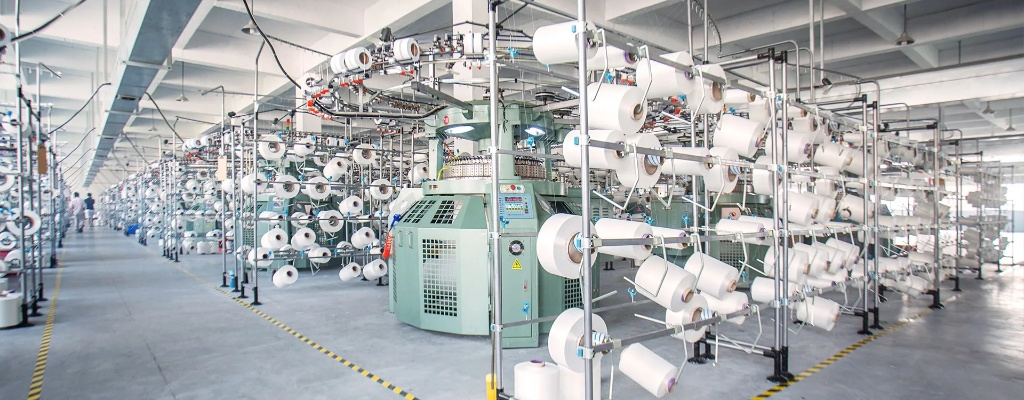
Materials Needed: Before we start, make sure you have all the necessary materials at hand. Here's what you'll need:

- Bobbin holder: This is the part of the machine that holds the bobbin. It's usually located on the left side of the machine.
- Bobbin: This is the reel of thread that your bobbin holder holds. You'll need to select the right size and type of thread for your project.
- Thread cutter: This is a tool that helps you cut the end of the thread before it enters the machine.
- Thread tensioner: This is a device that adjusts the tension of the thread as it winds around the bobbin.
- Thread guide: This is a tool that guides the thread into the bobbin.
- Thread winder: This is a device that winds the thread onto the bobbin.
- Thread tension gauge: This is a tool that measures the tension of the thread.
- Thread tensioner: This is a device that adjusts the tension of the thread as it winds around the bobbin.
- Thread guide: This is a tool that guides the thread into the bobbin.
- Thread winder: This is a device that winds the thread onto the bobbin.
Steps to Thread a Textile Machine: Here are the steps to thread a textile machine:
- Start by selecting the right bobbin for your project. Make sure it's the correct size and type of thread for your work.
- Cut the end of the thread with the thread cutter. Be careful not to cut too close to the bobbin holder or the machine itself.
- Place the thread guide on the bobbin holder and align it with the bobbin. Make sure the thread guide is pointing towards the center of the bobbin.
- Wind the thread onto the bobbin using the thread winder. Start from the outside edge of the bobbin and move towards the center.
- Once you have enough thread on the bobbin, tighten the tensioner to the desired level. Use the thread tension gauge to measure the tension.
- Insert the thread guide into the bobbin again and position it correctly. Make sure the thread guide is pointing towards the center of the bobbin.
- Start winding the thread onto the bobbin again. Keep the tensioner tight and use the thread guide to guide the thread into the bobbin.
- Once you have finished winding the thread onto the bobbin, remove the thread guide and check the tension again. Make sure everything is in place and secure.
- Test the machine to ensure that everything works properly. If there are any issues, take them into account and address them accordingly.
Case Study: Let's take a look at a real-life example of how to thread a textile machine.
John was working on a new project for his local clothing store. He needed to create some high-quality fabrics for their summer collection. To achieve this, he decided to use a modern machine that had advanced features for threading.
Firstly, John selected the right bobbin for his project. He made sure it was the correct size and type of thread for his work. Next, he cut the end of the thread with the thread cutter carefully. He placed the thread guide on the bobbin holder and aligned it with the bobbin. With the thread winder in hand, he started winding the thread onto the bobbin. He tightened the tensioner to the desired level and inserted the thread guide once more. Finally, he tested the machine to ensure that everything worked properly.
The result was amazing! John had created high-quality fabrics that were perfect for his summer collection. He was thrilled with the outcome and knew that he had mastered the art of threading a textile machine.
Conclusion: In conclusion, threading a textile machine is an essential skill that every textile worker should have. By following these steps and using the tools provided, you can create high-quality fabrics that meet your needs. Remember to always test your machine before starting a new project to ensure smooth operation. Happy sewing!
大家好,今天我们将一起探讨纺织厂中穿线的重要性以及相关的教程,在纺织行业中,穿线技术是一项关键技能,对于保证产品质量、提高生产效率具有重要意义,本教程将通过图文并茂的方式,帮助初学者和从业者更好地掌握这一技能。
纺织厂穿线基础知识

纺织厂穿线的重要性
纺织厂穿线是确保纺织品质量的关键环节,通过正确的穿线方式,可以确保线材的稳定性和耐用性,从而保证纺织品的性能和质量。
纺织厂穿线的基本步骤
(1)准备工具:准备所需的工具,如剥线钳、钢丝钳、绝缘胶带等。 (2)检查材料:检查线材是否符合要求,如材质、规格等。 (3)选择合适的穿线方法:根据线材类型和用途选择合适的穿线方法。 (4)操作注意事项:在操作过程中要注意安全,避免触电等危险情况发生。
穿线教程详解
剥线技巧
(1)剥线前准备:在剥线前,先准备好剥线工具和线材。 (2)剥线方法:根据线材类型和用途选择合适的剥线方法,如剥去绝缘外皮或裸线等。
穿入导线
(1)选择合适的穿线孔位:根据需要穿线的部位选择合适的穿线孔位。 (2)穿入导线:使用适当的穿线工具将导线穿入孔位中,在穿入过程中要注意保持导线与孔位的紧密连接。

固定导线
(1)选择合适的固定方法:根据导线类型和用途选择合适的固定方法,如使用螺丝、卡子等。 (2)固定导线:使用适当的固定工具将导线固定在指定的位置上,在固定过程中要注意保持导线的稳定性和牢固性。
检查与测试
(1)检查导线:在完成穿线后,要进行仔细的检查,确保导线没有损坏或脱落。 (2)测试性能:对穿好的导线进行性能测试,如电阻测试、绝缘性能测试等,确保其符合要求。
案例分析
以某纺织厂为例,介绍实际穿线过程中的注意事项和操作技巧,该纺织厂在生产过程中经常需要使用各种类型的导线进行穿线,如铜芯导线、铝芯导线等,在案例分析中,我们将重点介绍以下几个方面:
- 准备工作:在开始穿线前,该纺织厂需要准备好相应的工具和材料,如剥线钳、钢丝钳、绝缘胶带等,还需要检查线材的质量和规格是否符合要求。
- 操作技巧:在该纺织厂的实际操作中,需要注意以下几点:要根据导线类型和用途选择合适的穿线方法;在操作过程中要注意保持导线的稳定性和牢固性;在完成穿线后要进行仔细的检查和测试,确保其符合要求。
- 安全注意事项:在穿线过程中,需要注意安全问题,要佩戴好相应的防护用品,如绝缘手套等;要遵守操作规程,避免触电等危险情况发生。
总结与展望
通过本教程和案例分析,我们了解了纺织厂穿线的重要性以及相关的教程,在纺织行业中,穿线技术是一项关键技能,对于保证产品质量、提高生产效率具有重要意义,在实际操作中,需要注意准备工作、操作技巧和安全注意事项等方面,随着纺织行业的不断发展,对于穿线技能的要求也会不断提高,因此我们需要不断学习和掌握新的技能和知识。
Articles related to the knowledge points of this article: