Designing Fabrics with Photoshop:A Comprehensive Guide
This article provides a comprehensive guide on how to design fabrics using Photoshop. It covers the basics of working with Photoshop, such as selecting and editing images, adjusting colors and contrast, and adding textures and effects. It also explains how to use different layers, filters, and tools to create unique designs for fabrics. The article includes examples of how to create various types of fabrics, such as stripes, checks, and polka dots. Additionally, it offers tips on how to save and share your designs with others. Overall, this article is a great resource for anyone looking to create their own custom fabric designs using Photoshop.
Introduction: In the realm of textile design, where creativity meets practicality, Adobe Photoshop has emerged as a powerful tool for creating visually stunning fabric images. Whether you're a professional designer or an enthusiast looking to enhance your skills, this guide will walk you through the essential steps and techniques to master in designing textiles using Photoshop. From selecting the right tools to understanding color theory, we'll delve into every aspect of this creative process.
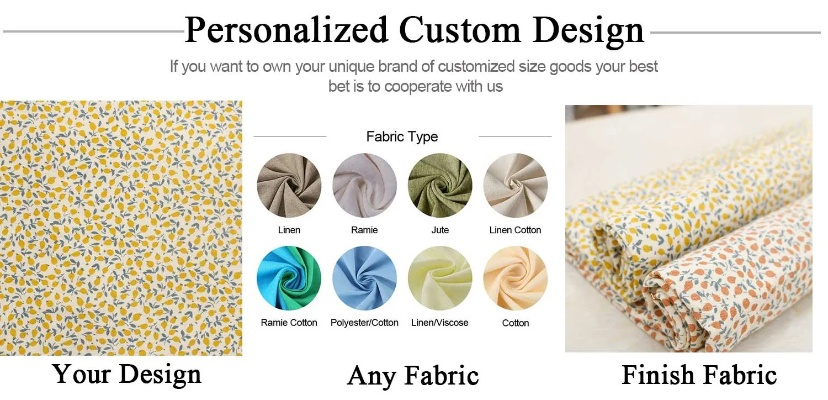
Step 1: Preparation and Research Before diving into the design process, it's crucial to gather inspiration and research the latest trends in textile design. This could involve exploring online forums, attending industry events, or simply browsing through magazines and blogs. By having a clear understanding of what's currently popular, you can incorporate these elements into your designs and create something truly unique.
Step 2: Selecting the Right Tools Adobe Photoshop offers a wide range of tools and features designed specifically for graphic design, including layers, filters, brushes, and more. When working with textiles, it's important to choose tools that are best suited for the type of image you're creating. For example, if you're working on a digital pattern, using a grid system to organize your designs is essential for maintaining consistency. Similarly, if you're creating a photo-realistic image, using textures and effects like grain and saturation can help bring your fabrics to life.
Step 3: Importing and Editing Images Once you've selected your tools and have gathered inspiration, the next step is importing and editing your images. In Photoshop, you can easily open multiple files at once, allowing you to work on multiple projects simultaneously. Once your images are imported, you can adjust their size, rotate them, and apply any necessary transformations to ensure they fit seamlessly into your design.
Step 4: Layering and Combining Images When working with multiple images, layering becomes crucial. By stacking different layers on top of each other, you can control how each element interacts with the others, resulting in a more dynamic and cohesive design. For instance, if you're working on a pattern, you can layer individual patterns together to create a seamless whole. Similarly, if you're working on a photo-realistic image, combining multiple photos can help bring out the details and textures that make up your fabrics.
Step 5: Applying Color Theory Color plays a significant role in textile design, as it not only adds visual interest but also conveys emotions and messages. In Photoshop, there are several tools available for applying color theory, including the Hue/Saturation/Lightness (HSL) mode, which allows you to adjust the color balance of your images. Additionally, using color gradients and blending modes can help you achieve the perfect shade of color for your fabrics.
Step 6: Styling and Sizing Once you've created your design, it's time to style and resize it to fit within the constraints of your project. This involves adjusting the brightness, contrast, and saturation of your images to ensure they look good on their intended background. Additionally, sizing your images ensures they are optimized for printing or display purposes without losing quality.
Case Study: Designing a Fashion Fabric Collection Let's take a closer look at a real-world example of how Photoshop can be used to create a fashion fabric collection. Let's say you're a textile designer working for a high-end clothing brand. You need to create a series of fabric images that showcase different patterns, textures, and colors.
First, you would gather inspiration by visiting fashion shows, reading fashion magazines, and studying the latest trends in textile design. Then, you would use Adobe Photoshop to select the right tools and techniques for each project. For example, if you're working on a pattern, you might use the Pen Tool to create custom shapes and lines, while the Gradient Tool can help you add color to your designs.
Next, you would import and edit your images, adjusting their size, rotation, and transformations to ensure they fit seamlessly into your design. As you work, you would layer different images together to create a cohesive whole, using color theory to achieve the perfect shade of color for your fabrics.
Finally, after completing all the design elements, you would style and resize your images to fit within the constraints of your project. This might involve adjusting the brightness, contrast, and saturation of your images to ensure they look good on their intended background.
Conclusion: With Adobe Photoshop, you can turn your imagination into reality when it comes to textile design. By following the steps outlined above, from preparatory research to final styling and sizing, you can create visually stunning fabric images that capture the essence of your designs. So why not give it a try? With practice and patience, you too can become a textile design expert with Photoshop!
在纺织品行业中,Photoshop是一款强大的图像处理软件,它可以帮助设计师们轻松地制作出高质量的纺织品图片,本文将介绍如何使用Photoshop设计纺织品图片,并提供一些实例和案例分析。
Photoshop基础
- 打开Photoshop软件
- 选择合适的工具进行操作
- 调整图片色彩和亮度
纺织品图片设计步骤
-
确定图片主题和风格 a. 分析纺织品的特点和风格 b. 选择适合的色彩和图案
-
准备纺织品素材 a. 选择高质量的纺织品图片素材 b. 根据需求调整图片大小和比例
-
使用Photoshop进行设计 a. 添加文字描述和说明 b. 调整纹理和质感 c. 添加背景和过渡效果 d. 调整图片的色彩平衡和对比度
案例分析
-
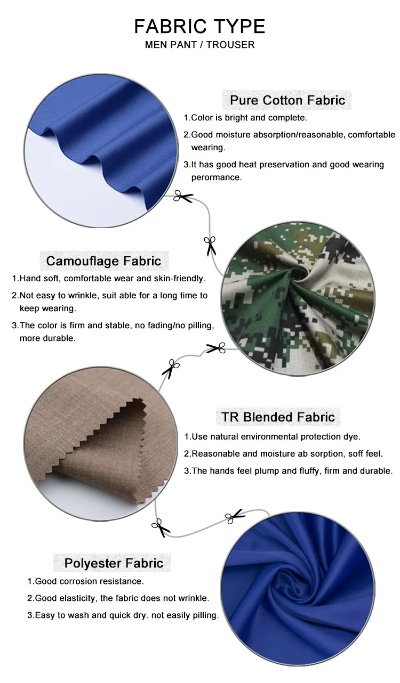
丝绸织物设计 a. 选择高质量的丝绸织物图片素材 b. 使用滤镜效果突出丝绸的光泽和质感 c. 添加文字描述和说明,突出产品的特点 d. 调整色彩平衡和对比度,使丝绸织物图片更加美观
-
棉布印花设计 a. 选择棉布印花图片素材 b. 使用渐变滤镜增加棉布的层次感和立体感 c. 根据需要添加文字描述和说明,突出印花效果 d. 调整色彩平衡和对比度,使棉布印花图片更加生动活泼
英文表格补充说明
以下是英文表格,用于补充说明在纺织品图片设计中可能用到的相关术语和参数:
| 术语或参数 | 解释 |
|---|---|
| 纺织品类型 | 如丝绸、棉布等 |
| 图片素材来源 | 如网络、实体店等 |
| 色彩选择 | 根据纺织品风格和特点选择合适的色彩 |
| 滤镜效果 | 如高斯模糊、渐变滤镜等,用于突出纹理和质感 |
| 字幕描述 | 对纺织品的特点、用途等进行详细描述 |
| 过渡效果 | 为图片添加平滑的过渡效果,使图片更加美观 |
| 图片尺寸与比例 | 根据纺织品大小和需求选择合适的尺寸与比例 |
| 调整参数 | 如亮度、对比度、色彩平衡等,用于优化图片效果 |
实例说明(结合英文案例)
丝绸织物设计实例分析
- 选择高质量的丝绸织物图片素材,色彩鲜艳且光泽感强。
- 使用滤镜效果突出丝绸的光泽和质感,如使用高斯模糊滤镜使丝绸更加平滑,同时添加文字描述和说明,突出产品的特点,调整色彩平衡和对比度,使丝绸织物图片更加美观,最终呈现出一幅丝绸织物的高质量图片。
棉布印花设计实例分析
- 选择高质量的棉布印花图片素材,色彩丰富且具有立体感。
- 使用渐变滤镜增加棉布的层次感和立体感,使棉布印花更加生动活泼,同时根据需要添加文字描述和说明,突出印花效果,调整色彩平衡和对比度,使棉布印花图片更加符合产品风格,最终呈现出一幅棉布印花的高质量图片。
总结与建议
使用Photoshop设计纺织品图片是一项非常实用的技能,可以帮助设计师们制作出高质量的纺织品图片,在实践过程中,可以根据具体需求选择合适的工具和参数进行优化,也可以参考一些优秀的案例进行分析和学习,不断提高自己的设计水平。
Articles related to the knowledge points of this article:
Shanghai Textile Expo:A Visual Introduction
The Characteristics of the纺织服装行业
