The Art of Textile Printing:A Journey Through the Process
This article delves into the intricate process of textile printing, a craft that has been passed down through generations. From the initial design to the final product, the process involves a series of steps that require precision and dedication. The first step is the creation of the pattern, which is then transferred onto the fabric using various techniques such as silkscreening, embroidery, or screen printing. Once the design is in place, the next step is to apply the dyes and inks, which are carefully mixed according to the specific requirements of each project. The application of these dyes and inks is done by hand or machine, depending on the complexity of the design. Finally, the printed fabric is washed and dried, and the finished product is ready for display or use. Through this journey, we see not only the beauty of the finished product but also the skill and creativity required to bring it to life.
Introduction: Textile printing is a fascinating process that has been used for centuries to create beautiful patterns and designs on fabrics. From simple stencils to complex digital screens, textile printing techniques have evolved significantly over time. In this article, we will explore the different steps involved in the textile printing process and how they contribute to the final product.

Step 1: Design and Preparation The first step in the textile printing process is designing and preparing the artwork. This involves selecting the appropriate colors, shapes, and sizes for the design, as well as determining the best placement of the pattern on the fabric. Once the design is finalized, it needs to be transferred onto a transferable medium such as paper or plastic.
Table: Design and Preparation Steps | Step | Details | |------|-------| | Design | Choose colors, shapes, and sizes for the artwork. | | Transfer onto transferable medium | Use paper or plastic to transfer the design onto the fabric. |
Case Study: Nike's Air Max 90 Nike's Air Max 90 was a popular sneaker model in the late 1990s. The design features a bold, colorful print on the upper part of the shoe, which was created using a combination of traditional silkscreen printing and modern digital technology. The design was developed by a team of graphic artists who worked closely with Nike's designers to ensure that the print would complement the overall style of the shoe. The artwork was then transferred onto a transferable medium (in this case, a vinyl film) and applied to the fabric of the shoe using a heat press. The result was a stunning print that added an element of flair to the Air Max 90.
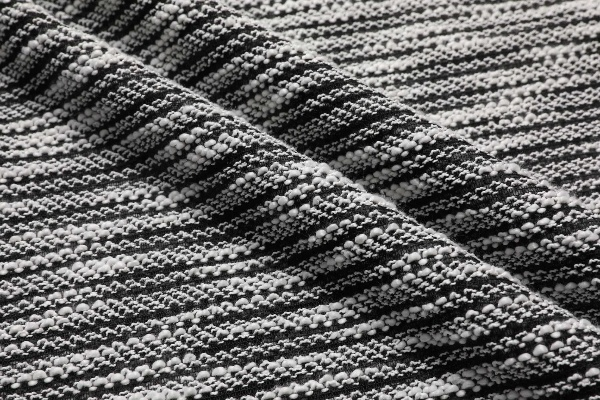
Step 2: Screen Printing Screen printing is a popular technique for creating intricate designs on fabrics. It involves using a mesh screen to apply ink directly onto the fabric, allowing only the desired areas to be printed. This process creates a crisp, detailed image that can be customized to any size or shape.
Table: Screen Printing Steps | Step | Details | |------|-------| | Apply ink onto the fabric | Use a mesh screen to apply ink directly onto the fabric. | | Place the fabric under pressure | Press the screen onto the fabric to transfer the ink. | | Remove the screen | Remove the screen and allow the excess ink to dry. |
Case Study: Disney’s Mickey Mouse Shirt Disney's Mickey Mouse shirt was a hit among fans when it was released in 2018. The design featured a detailed illustration of Mickey Mouse printed on the front of the shirt, along with other iconic Disney characters. The screen printing process was used to create the intricate details of the design, allowing the printers to create a high-quality print that was both eye-catching and authentic.
Step 3: Embroidery Embroidery is a traditional method of adding detail to textiles, often used in clothing, accessories, and home decor. It involves stitching small pieces of thread onto the fabric, creating a pattern or design that is unique to each piece.
Table: Embroidery Steps | Step | Details | |------|-------| | Cut threads into small pieces | Create a pattern or design using these threads. | | Stitch the threads onto the fabric | Use a needle and thread to sew the threads onto the fabric. | | Sew additional details onto the fabric | Add additional details to the design using additional threads. |
Case Study: Kate Spade's "Sparkle" Bag Kate Spade's "Sparkle" bag was designed with a playful touch, featuring a bright, colorful print on the exterior and intricate embroidery on the interior. The embroidery process was used to add a personal touch to each bag, creating a unique and memorable piece for every customer.
Step 4: Heat Setting Heat setting is a crucial step in the textile printing process that ensures the ink remains fixed to the fabric after it is printed. It involves applying heat to the printed area to activate the ink and make it permanent.
Table: Heat Setting Steps | Step | Details | |------|-------| | Apply heat to the printed area | Heat the printed area using a hot iron or other heat source. | | Allow the ink to set | Let the ink set for the desired amount of time, typically 5-10 minutes. | | Check for proper color and alignment | Ensure that the color is consistent and the design is aligned properly. |
Case Study: Ralph Lauren's Polo Shirt Ralph Lauren's Polo shirt was a popular choice for men's fashion shows in 2019. The design featured a bold, modern print on the front of the shirt, which was created using a combination of screen printing and heat setting. The screen printing process was used to create the intricate details of the design, while the heat setting process was used to ensure that the print remained fixed and durable.
Conclusion: Textile printing is a versatile and creative process that allows designers to create beautiful, one-of-a-kind garments and accessories. By following these four steps, from design and preparation to heat setting, you can achieve a high-quality print that will impress your customers. Whether you're creating a classic piece of clothing or a modern accessory like the Nike Air Max 90 or Disney Mickey Mouse shirt, textile printing is a great tool for expressing your creativity and imagination.
在纺织品的制作过程中,印花工艺是一个重要的环节,它不仅影响着纺织品的外观和质感,还关系到纺织品的附加值和市场竞争力,本文将详细介绍纺织品印花工艺过程,并通过英文案例说明来加深理解。
纺织品印花工艺流程
设计阶段

在纺织品印花工艺的起始阶段,设计师需要根据市场需求和产品定位进行设计,这包括选择合适的印花图案、颜色搭配以及印花材料的选择。
准备阶段
在印花工艺准备阶段,需要准备好所需的印花设备、染料、印花材料等,还需要对印花场地进行清洁和整理,确保印花效果的质量和稳定性。
印花制作过程
a. 印花设备操作:使用印花设备将印花图案印制在纺织品表面,这包括选择合适的印花设备型号、设置印花参数、控制印花速度等。
b. 染料使用:根据设计要求选择合适的染料,并按照染料的使用说明进行操作,确保染料的均匀性和稳定性。
c. 印花材料处理:对印花材料进行预处理,如烘干、软化等,以确保印花效果的质量和稳定性。
后期处理阶段
完成印花后,需要进行后期处理,如熨烫、定型等,这有助于提升纺织品的外观和质感,使其更加美观和耐用。
英文案例说明
以某知名纺织品品牌为例,其纺织品印花工艺过程如下:
-
设计阶段:设计师根据市场需求和产品定位,设计出具有独特风格和特色的印花图案,该图案采用了鲜艳的颜色搭配和细腻的线条设计,旨在提升纺织品的时尚感和品质感。
-
准备阶段:该品牌在准备阶段选择了高品质的印花材料和先进的印花设备,确保印花效果的质量和稳定性,对印花场地进行了清洁和整理,为后续的印花制作做好准备。
-
印花制作过程:在印花制作过程中,该品牌采用了先进的印花技术,如数码印花、喷墨印花等,具体操作步骤如下:首先使用数码印花设备将图案印制在纺织品表面;然后根据染料的使用说明进行染料操作;最后对印花材料进行预处理,如烘干、软化等,整个过程严格按照工艺流程进行操作,确保印花效果的质量和稳定性。
纺织品印花工艺过程是一个复杂而精细的过程,需要经过设计、准备、印花制作和后期处理等多个环节,在具体操作过程中,需要严格按照工艺流程进行操作,确保印花效果的质量和稳定性,还需要不断优化和完善工艺流程,提高纺织品的附加值和市场竞争力。
Articles related to the knowledge points of this article:
The Role of Textile Testing in Wuxi,China
The Transformation from Textile Tower to Dopamine Hub
The Global Fabric Industry An Industrial Landscape and Challenges