纺织品打样步骤,从设计到成品的详细指南
This article provides a comprehensive guide on the steps involved in producing textile samples from design to final product. The process begins with the creation of a 3D model of the desired textile design using software such as SketchUp or Adobe Illustrator. Once the design is finalized, it is printed onto a fabric sample board using a digital printing technique. The sample board is then cut and sewn together to create a physical prototype of the textile design.,The next step is to test the fabric sample for fit, color, and quality. This involves measuring the dimensions of the sample and comparing them to the specifications provided by the designer. If necessary, adjustments are made to the design before moving on to the next stage.,Once the fabric sample is deemed satisfactory, it is ready for mass production. The design is then transferred to a sewing machine or other machinery used for textile production. The fabric sample is then cut into individual pieces and sewn together to create a finished product.,In conclusion, producing textile samples from design to final product requires careful planning and attention to detail. By following these steps, designers can ensure that their designs meet the needs and expectations of their clients while also maximizing their creativity and productivity.
Introduction: In the world of textiles, creating a sample that accurately represents your final product is essential for ensuring quality and consistency across all stages of production. This guide will walk you through the key steps involved in designing, preparing, and testing your fabric samples. By following these instructions, you can ensure that your designs meet the standards expected by both manufacturers and retailers.
Designing Your Sample: Before you begin with the actual fabric sampling process, it's crucial to have a solid understanding of what you're trying to achieve with your design. Here are the basic steps involved in designing your sample:
-
Identify your target market: Determine who your product will appeal to and what their preferences are. This information will guide your design choices.

-
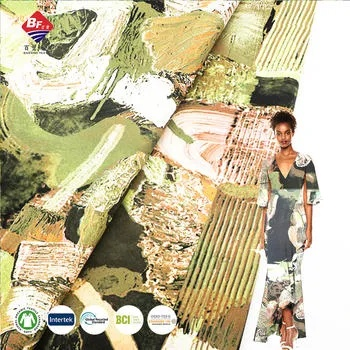
Choose your fabric: Select the right type of fabric based on its texture, color, and pattern. Consider the end use of the garment or accessory you're making.
-
Develop a concept: Create a sketch or diagram of your design, outlining the shape, size, and overall aesthetic.
-
Sketch and draft: Use a pencil or computer software to create detailed drawings of your design. Be sure to include all necessary details such as seams, collars, pockets, and other embellishments.
-
Prepare a swatch: Take a small piece of fabric from your design and cut it into a swatch. This will serve as the basis for your sample fabric.
-
Print your design: If you're working with a printer, prepare your design in a format that can be easily printed onto fabric.
-
Test different colors: To ensure your sample looks accurate, test multiple colors and patterns against your original design.
Preparing Your Sample: Once you have your sample fabric, it's time to move on to the next step: preparing it for testing. Here are some important considerations:
-
Cutting the sample: Using scissors or a rotary cutter, carefully cut the sample fabric according to the dimensions you've determined. Ensure that the edges are straight and the pieces are evenly spaced.
-
Folding and pinning: Fold each piece of fabric in half lengthwise, then press the creases with an iron. Pin the pieces together at the fold line to secure them in place.
-
Sewn seams: Use a sewing machine or needle and thread to stitch the pieces together along the fold line. Make sure to backstitch every few stitches to reinforce the seam.
-
Finishing touches: Add any additional embellishments or finishing touches such as buttons, zippers, or linings.
-
Labeling: Include labels on your sample indicating the name of the design, the brand, and any other relevant information.
Testing Your Sample: Once you've completed your sample fabric, it's time to test it thoroughly to ensure it meets your quality standards. Here are some steps to follow:
-
Inspection: Take a close look at your sample to identify any flaws or areas that need improvement.
-
Quality control: Check for proper fit, color accuracy, and overall consistency across all pieces.
-
Feedback gathering: Ask friends, family members, or industry professionals for feedback on your sample. Their opinions can help you make improvements before moving forward.
-
Repeat testing: If necessary, repeat the testing process until you're satisfied with the results.
-
Final approval: Once you're confident that your sample meets all requirements, submit it for final approval.
Case Study: Let's take a closer look at how this process works in practice with a real-world example. Imagine you're designing a new line of men's shirts using a popular fabric company's linen material. You want to ensure that the samples you produce accurately represent the finished product.
-
Target Market: You've identified that your target market is young professionals who value comfort and style.
-
Fabric Choice: After considering various options, you select a soft, lightweight linen fabric that has a subtle sheen.
-
Concept Development: You sketch out the basic outline of your design, including the collar, cuffs, and pockets.
-
Fabric Swatch: You take a small piece of fabric from your design and cut it into a swatch to test against your original design.

-
Printing and Testing Colors: You print your design onto a piece of linen fabric and test different colors to ensure they match your original design.
-
Preparing Sample: You cut the sample fabric into the correct size and shape, followed by folding and pinning.
-
Seaming and Finishing: You sewed the pieces together along the fold line and added any additional embellishments as needed.
-
Labeling: You included labels on the sample indicating the name of the design and any other relevant information.
-
Testing: You inspected the sample for any defects and received feedback from friends and family members. Based on their feedback, you made necessary adjustments before submitting it for final approval.
Conclusion: By following these detailed steps, you can create a high-quality sample fabric that accurately represents your final product. Remember to keep track of your progress and adjust your approach as needed to ensure success in every stage of your design journey. With dedication and attention to detail, you can turn your ideas into beautiful, functional textiles that meet the expectations of both manufacturers and consumers alike.
在纺织品行业中,打样是一个至关重要的环节,它不仅确保了产品的质量与性能,还为后续的生产提供了参考依据,本文将详细介绍纺织品打样的步骤,并通过案例分析进一步说明。
打样流程
材料准备
a. 选择合适的面料材质 b. 根据设计要求确定面料尺寸和规格 c. 准备必要的辅助材料,如染料、助剂等
设计确认
a. 与设计师沟通,确认样品设计细节 b. 确认样品所需的面料数量和颜色搭配
样品制作
a. 使用专用设备进行样品制作,如梭织机、针织机等 b. 根据设计要求进行裁剪、缝制等工艺处理 c. 确保样品符合质量标准,如尺寸、纹理、颜色等
样品测试
a. 进行物理性能测试,如拉伸强度、耐磨性等 b. 进行外观检测,确保样品符合设计要求 c. 根据测试结果调整样品,确保最终产品符合标准
案例分析
以某知名纺织品品牌为例,其打样流程如下:
- 材料准备:选择高品质面料,确保材质符合品牌标准,根据设计要求确定面料尺寸和规格,准备染料、助剂等辅助材料。
- 设计确认:与设计团队沟通,确认样品设计细节,根据品牌定位和市场需求,确定样品的设计风格和功能特点。
- 样品制作:使用先进的纺织设备进行样品制作,根据设计要求进行梭织或针织工艺处理,确保样品在制作过程中符合质量标准,该品牌采用高质量的纤维材料,经过精细的工艺处理,制作出具有独特纹理和光泽感的样品。
- 样品测试:进行各项物理性能测试,如拉伸强度、耐磨性等,确保样品在各项指标上符合品牌标准,进行外观检测,确保样品符合品牌的设计要求,该品牌还邀请客户进行试穿体验,收集反馈意见,以便更好地满足客户需求。
补充说明(表格)
以下是纺织品打样步骤的补充说明表格:
| 步骤 | 描述 | 说明 |
|---|---|---|
| 材料准备 | 选择面料材质 | 根据设计需求选择合适的面料材质 |
| 设计确认 | 与设计师沟通 | 确认样品设计细节 |
| 设备使用 | 使用专用设备进行样品制作 | 如梭织机、针织机等 |
| 工艺处理 | 进行裁剪、缝制等工艺处理 | 根据设计要求进行工艺处理 |
| 质量检测 | 进行物理性能测试 | 如拉伸强度、耐磨性等 |
| 外观检测 | 进行外观检测 | 确保样品符合品牌设计要求 |
| 其他注意事项 | 其他注意事项 | 如环保要求、安全标准等 |
纺织品打样是一个复杂而关键的过程,需要严格的质量控制和测试,通过上述详细的介绍和案例分析,我们可以更好地了解纺织品打样的步骤和注意事项,在实际操作中,还需要注意环保、安全等方面的要求,希望本文能够帮助大家更好地了解纺织品打样的步骤和注意事项。
Articles related to the knowledge points of this article:
Exploring the Future of Textiles:A Comprehensive Analysis of Haian Textiles
Eco-friendly Textiles:A Comprehensive Guide to Effective Energy Conservation